
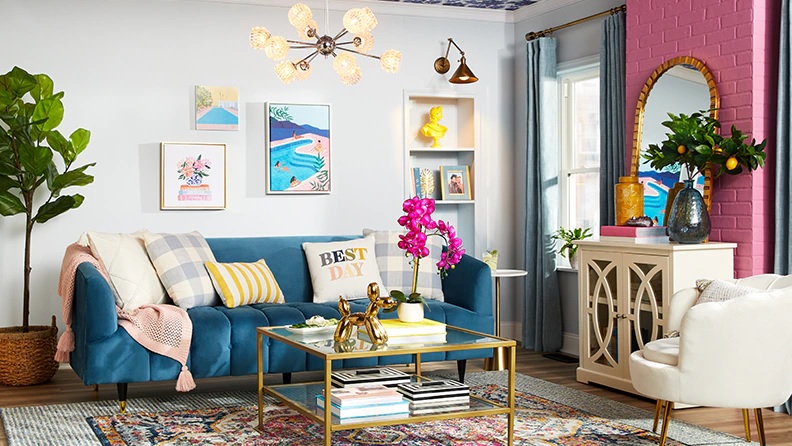
Affordable Home Improvement Projects That Can Transform Your Living Space

Home renovation shows have trained a lot of homeowners to believe that a meaningful upgrade starts with swinging a sledgehammer and writing a forty-thousand-dollar check. If you cannot gut the kitchen, move plumbing lines, or install wide-plank white oak across the first floor, it is easy to feel stuck living with rooms that feel tired and impersonal.
In reality, the features that make a house look dated or unpolished are rarely structural. More often, they are the visual details sitting right at eye level: yellowing light fixtures, scuffed trim, mismatched hardware, flat builder-grade walls, and harsh overhead bulbs. Targeting those high-visibility touchpoints lets you dramatically change how your home looks and feels over a couple of weekends, often for a few hundred dollars per room.

Rethink Your Paint Strategy Beyond Basic Walls

Fresh paint remains the highest-return upgrade in residential design, yet most people stop short of what paint can actually accomplish. Rolling a clean coat of warm white, soft greige, or muted sage over scuffed drywall immediately brightens a room, though the real transformation happens when you pay attention to trim, doors, and ceilings.
Builder-grade baseboards and door casings take a beating from vacuums, pets, and furniture. Running a crisp bead of paintable caulk along separated trim seams, sanding rough edges lightly, and applying fresh satin or semi-gloss trim paint makes an entire room look sharper and better maintained. If your ceilings have taken on a dull grayish cast over the years, rolling on a fresh coat of flat ceiling white restores brightness you did not realize you had lost.
For a bolder upgrade without spending extra money, consider painting interior doors and trim a deeper contrasting tone—such as warm charcoal, muted olive, or soft slate—against lighter walls. Even inexpensive hollow-core doors look noticeably more custom when finished in a rich, deliberate shade rather than scuffed factory white.

Upgrade Your Lighting Fixtures and Bulb Temperatures

Nothing ages an otherwise nice living room or hallway faster than dated dome ceiling lights or heavy, yellowed fixtures left behind by previous owners. Replacing a basic flush-mount ceiling light with a clean linen drum fixture, a matte black semi-flush mount, or a modern glass pendant takes less than an hour with the breaker switched off and usually costs between $50 and $150 per fixture.
Before swapping a single light, however, check the bulbs already screwed into your lamps and sockets. Many homes accidentally mix harsh blue-white daylight bulbs with warm yellow bulbs in the same open floor plan, creating visual clashing that makes furniture and paint colors look flat. Standardizing living areas around 2700K to 3000K warm white LED bulbs instantly makes rooms feel calmer, cozier, and far more cohesive.
Two low-cost additions push lighting even further:
  • Install dimmer switches: Replacing standard toggle switches in dining rooms, living spaces, and bedrooms with LED-compatible dimmers costs roughly $25 to $40 per switch and lets you shift a room from bright daytime task lighting to relaxed evening ambiance in seconds.

  • Add plug-in wall sconces: Flanking a bed, sofa, or reading chair with plug-in sconces frees up nightstand and side-table space while adding designer-level layered lighting with zero electrical rewiring. Simple paintable cord covers neatly disguise wires running down the wall.

Swap Out Everyday Hardware and High-Touch Fixtures

You touch door handles, cabinet pulls, light switches, and faucets dozens of times a day. Upgrading these small contact points refreshes the entire feel of a space without altering cabinetry or plumbing lines.

Kitchen and Bathroom Cabinetry

Replacing dated chrome knobs or worn wooden pulls with solid-feeling brushed brass, champagne bronze, or matte black hardware updates a kitchen in a single afternoon. Before ordering online, measure the exact center-to-center distance between existing screw holes on drawer pulls so new hardware drops straight into place without wood filler, sanding, or repainting.

Doors, Outlets, and Plumbing Touchpoints

Small electrical and plumbing swaps create a surprisingly clean finish when done across an entire room:
  • Wall plates and outlets: Yellowed, paint-splattered outlet covers quietly drag down freshly painted walls. Replacing old outlets and switches with crisp white decora paddles and screwless wall plates costs just a few dollars per wall and makes surfaces look sleek.

  • Interior door handles: Trading outdated polished brass doorknobs for modern levers in matte black or satin nickel improves both look and daily ergonomics, especially when carrying laundry or groceries.

  • Faucets and showerheads: Installing a high-arc pull-down kitchen faucet or swapping a calcified builder showerhead for a wider handheld model upgrades daily comfort immediately for under $150.

Add Architectural Character With Simple Wall Molding

Newer homes and open-concept apartments often suffer from large expanses of blank drywall that feel boxy no matter how nicely they are furnished. Adding lightweight wood or pre-primed MDF trim introduces depth, shadow lines, and architectural character that makes a room look thoughtfully constructed.
Picture frame molding in a dining room or hallway, board and batten along a mudroom wall, or vertical wood slats behind a headboard all rely on inexpensive materials available at any local home improvement store. With careful measuring, a miter box or saw, construction adhesive, finishing nails, and caulk, you can finish an accent wall for under $150. Painting the molding the exact same color as the wall behind it creates subtle, high-end texture that never feels busy or overwhelming.

Refresh Kitchen and Bathroom Surfaces Without Demolition

Kitchens and bathrooms carry the heaviest visual weight in a home, and they are also the most expensive rooms to remodel. Smart surface refreshes bridge the gap when full replacement is not in the budget.
Start with the least glamorous project that delivers the biggest visual payoff: fresh caulk and clean grout. Peeling, discolored caulk along a bathtub or kitchen backsplash makes even spotless rooms look dirty. Scraping out old silicone, cleaning the joint thoroughly with rubbing alcohol, and laying down a neat, fresh bead costs around $15 and immediately restores a crisp edge. If floor tile grout has permanently darkened, applying a grout colorant and sealer restores uniform, like-new lines without chiseling out a single tile.
In bathrooms, replacing a bare, clipped-on builder mirror with a framed round or arched mirror instantly elevates the vanity. If removing the glued mirror feels risky, affordable mirror-frame kits attach directly around the glass edges to create a finished custom look. In the kitchen, upgrading a dull bare wall behind the counter with high-quality thick peel-and-stick ceramic or stone-look tiles—or covering dated laminate surfaces with a durable countertop refinishing kit—buys years of fresh style while you save for larger plans.

Elevate Window Treatments to Change Room Scale

Bent vinyl mini-blinds and short curtains that stop awkwardly at the windowsill shrink a room visually and block natural light. Swapping plastic blinds for woven bamboo shades, faux-wood blinds, or clean cordless cellular shades adds warmth and texture immediately.
If you hang drapery panels, follow the high-and-wide rule. Mount the curtain rod four to six inches below the ceiling—or halfway between the top of the window trim and the ceiling—and extend the rod six to ten inches past each side of the window frame. Hanging curtains wide allows fabric to rest against the wall when open rather than blocking glass, letting maximum sunlight pour in while making ceilings appear taller and windows look much more generous.

Turn Dead Corners Into Functional Storage

Clutter cancels out even the sharpest paint job and prettiest light fixtures. Look closely at where everyday piles accumulate: shoes by the front door, mail on the kitchen counter, towels draped over bathroom doors.
Installing a sturdy wall-mounted rail with solid hooks in an entryway, adding a slim floating console shelf beneath a mirror, or placing matching woven baskets on open shelving turns messy drop zones into intentional features. Inside closets and pantries, adding a second hanging rod, over-the-door racks, or simple wood shelf covers over wire racks creates real breathing room throughout the rest of the living space.

How to Get Professional Results on a Modest Budget

The difference between a budget upgrade that looks custom and one that looks rushed almost always comes down to focus and prep work. Resist the temptation to scatter small fixes across five different rooms at once. Instead, pick the one space you spend the most time in—usually the living room, primary bedroom, or kitchen—and complete paint, lighting, hardware, and window treatments together so you experience a dramatic payoff right away.
Invest a little extra patience in preparation: patch nail holes smoothly, wipe down grease before painting trim, measure twice before drilling, and test paint swatches on your actual walls in both morning daylight and evening lamp light before buying gallons. Thoughtful, well-executed small improvements compound quickly, turning an ordinary house into a living space that feels genuinely welcoming, functional, and distinctly yours without straining your savings.

Comments are closed.